We’re Moving!

SANYO DIGITAL CAMERA

Photo by: jetalone

And not around the corner, I might add.  The Scacchi family is moving to Houston, Texas! I know, I know, we just got here. We have been in Alaska for 6 months now (Tony has been here for 7) and we were offered an opportunity that we just couldn’t turn down.

Tony was offered to be relocated. It wasn’t a “must go,” more like a “would you like to go?” I don’t know if we would have said “Yes!” to any other city, but Houston is special. Why, you ask?

  1. Tony’s mom lives in Houston!  What could be better than Ava getting to spend time with her MomMom (that’s her “grandma” name)!  I’m also extremely excited for one word (two actually): DATE NIGHT!  Being in a city where you know no one (other than a few of Tony’s guy friends) is very difficult.  I won’t leave Ava with a stranger, so we have had ZERO mommy and daddy time since we have been up here.  We will be in Houston just in time for our anniversary!  Thank you MomMom!
  2. Cost of living.  Houston is cheap!  For being such a big city, everything is very inexpensive there.  It’s even cheaper than where we came from in Florida.  Alaska is expensive in comparison to Houston, but not compared to a lot of other places in the US (California, New York, etc.).  Essentially it will be like Tony getting a nice raise!
  3. Proximity to family.  I will be less than 1000 miles away from my family in Florida, even closer to my little sis once she’s away at college!  Most of Tony’s family lives in Texas too.
  4. Climate.  Don’t get me wrong, we have thoroughly enjoyed the snow.  That being said, I’m a Florida girl.  I have never been more excited for a sweltering, humid summer before in my life!  Bring on the flip-flops, sundresses, and bikinis!  Also, my gardening season will longer than the 3 months I have in Alaska.

Logistics

We plan on leaving in the next 2-3 weeks.  We are driving. With a toddler.  We may or may not be crazy.  It will take us approximately 7 days to get there.  It’s definitely going to be an exciting road trip.  You can be sure that we will keep you updated along the way!

Our 100th Post!

This is officially our 100th Post!  I put a lot of time and energy into this blog.  Some days I think of 10 things I want to write about and other times I will go days feeling very uninspired.  I’m okay with that.  At any given time I have about 15 or so posts that I’m working on.

I love hearing from you guys, whether it is here in the comment section or over on Facebook and Twitter.  You are part of the reason I keep going.  The other reason is that I truly enjoy this.  And although our blog doesn’t make much money (the amount is laughable), it is a part of our family.  We will continue to share our adventures with you.

I thought I would share our top 5 most popular posts out of our 100.  They are listed in order.

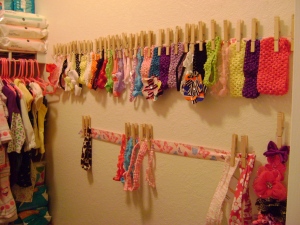
  1. Our DIY Headband Holder.  This was one of the first projects I posted here.DIY Headband Holder
  2. Food Waste Friday!  I am grouping all of the Food Waste Friday posts into one for this list because they actually held the next 4 slots.FoodWasteFriday
  3. Our Picture of the Day from October 18th, 2012.  This was our first day in Alaska!  I’m sorry for not posting a “Picture of the Day” more often.  I need to make this a priority.Eagle River, Alaska Sun
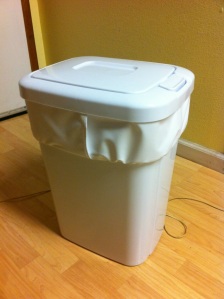
  4. The DIY Cloth Diaper Pail Liner.  This project was super easy!DIY Cloth Diaper Pail Liner
  5. Last but not least, our Afternoon at the Beach.  Okay, it really wasn’t the beach, but it was equally fun!Playing in the Snow

What would you like to see more of here at The Scacchi House?  What wouldn’t hurt your feelings if it went away?  I value your input!

Banana Bread: Nana’s Recipe Makeover

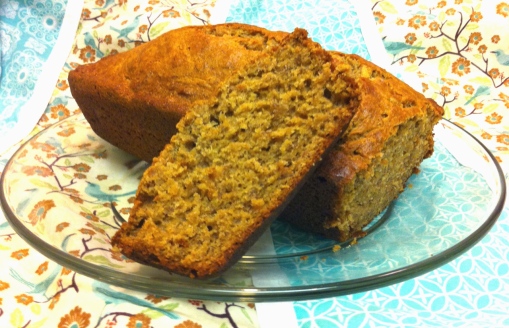
Banana Bread

One thing we always had regularly at our house growing up was banana bread.  My Mom used the same recipe that my Grandma (Nana) always used.  One day I was longing for a taste of home.  I wanted to bake some of that wonderful banana bread that my Mom always made.  I called Mom and had her email me the recipe.  Since we are trying to eat as clean as possible, I made a few adjustments to the recipe.  It tastes EXACTLY the same!  I was so happy.

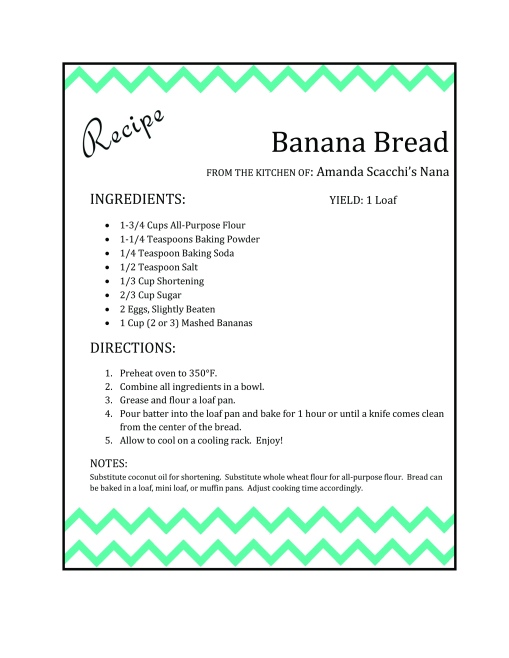
I put the recipe on one of my new chevron recipe cards for you to enjoy.  If you like the recipe card, it is available as a Word template in my Etsy shop in a few different colors.  This recipe is available here as a PDF download.

Banana Bread Recipe Card

This recipe is so easy.  You now have no excuse to use a boxed mix!  To make this recipe a bit more “clean,” I substituted coconut oil for the shortening and whole wheat flour for the all-purpose flour.  I also use organic evaporated cane sugar instead of white sugar.  It does not change the taste or texture at all.  Tony had no idea it was made with whole wheat flour.  You can also add walnuts (or any other nut) to the bread, but I personally feel that nuts in baked goods are an abomination. =) Tony feels differently.

To download the recipe card, click here.  Enjoy!

Are there any foods that remind you of home?  Let me know how you like this banana bread recipe!

Food Waste Friday: Beet It Wasted Coffee

FoodWasteFriday

After years of wasting hundreds, if not thousands of dollars of food, we are attempting to reduce our food waste. I will post a photo each week of our food waste and I will link up with Food Waste Friday over at The Frugal Girl.

I bought three beets a few weeks ago.  Since they are a root vegetable, they typically last a while.  I cooked one shortly after buying them, but the others have been in the veggie drawer of the fridge ever since.  If you have never bought fresh beets, you get the beets with the greens attached.  I just realized that you can cook and eat the greens too, just like kale or chard.  That was my plan.

By the time I got around to cooking them this week, they were way beyond saving.  The greens were wilted and droopy.  The beets on the other hand were still perfect! I roasted them and made beet sandwiches, complete with green goddess sauce.  A-MA-ZING!  If you haven’t given beets a try, you should.

So what do you do with the coffee at the bottom of the coffee pot that you don’t get around to drinking?  I would always just toss it, but not anymore.  When we lived in Florida, we had an iced coffee brewer just like this one.

One morning, it occurred to me that what I was pouring was essentially iced coffee.  Now after I finish a pot of coffee, I let the remaining coffee cool, then pour it into a mason jar and store it in the fridge.  Usually I have enough coffee after a day or two for one glass of iced coffee.

To make a glass of iced coffee, just combine your refrigerated coffee, sweetener (I use agave or evaporated cane sugar), and milk (or creamer).  You usually have more milk in iced coffee than you would in your regular cup, so leave a little extra room.  You can add ice if you would like.  I like to drink mine with a straw.  =)  Straws always make drinks feel that much more special.

How was your waste this week?  Do you make iced coffee at home?

Disclaimer: All links on the blog to Amazon are affiliate links.  If you purchase an item through this link, you are helping support this blog and my family. =)

Let’s Go Sledding!

The Scacchi Family

We went sledding on Monday afternoon at one of the wonderful parks in Anchorage.  This park has one of the best sledding hills in the city.  You can sort of see the hill behind the trees in the background.  This hill does not mess around.  It was super fun!  Don’t you love my $5 Columbia jacket from The Salvation Army?

Family in Alaska

It was a little chilly out, about 25 degrees.  After I ran back up the hill a few times, I was definitely not cold.  Ava always has a blast when we go outside.  (Trust me, she’s not miserable and cold like she looks in all the pictures.)

View from Anchorage, Alaska

This park has gorgeous views of the inlet and Sleeping Lady (the mountain, not an actual woman).

Alaska Mountains

Sledding in Alaska

We had a blast spending time as a family.  What outdoor activities have you done this winter?

Ice Ice Baby: A Free Collage!

Free Walgreens Picture

Walgreen’s has a coupon code right now for a FREE collage.  It really is completely free.

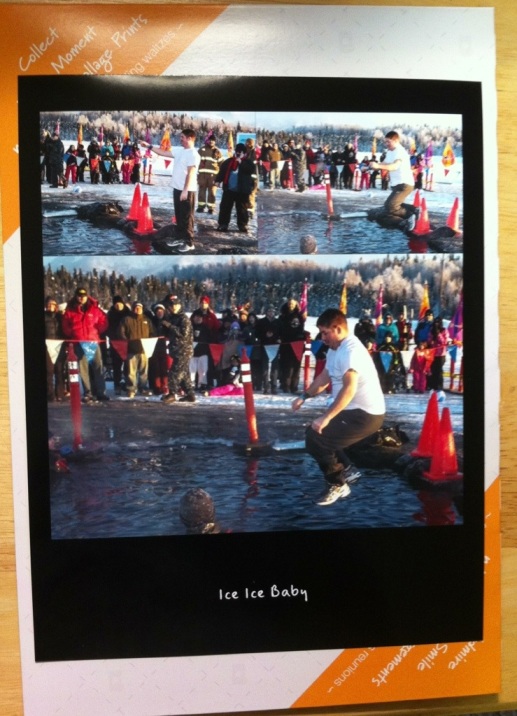
I wanted to do something nice for Tony since he’s my awesome hardworking husband and all.  I took advantage of the free collage and put this together.  I thought it would be a fun way to remember when he did the Polar Plunge.  I totally took a chance with the “Ice Ice Baby”.  I knew he would either love it or hate it.  He loved it!  Win!  Eventually, we will hang this with the rest of our photos on our frame wall.

Hurry!  The coupon code (COLLAGE4FREE) ends on March 20, 2013.

Made in the USA: Reasons to Love The Pampered Chef

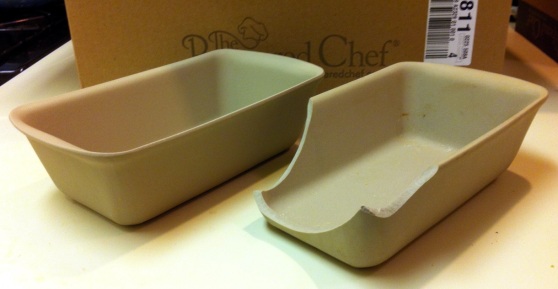
Made in the USAI have always loved The Pampered Chef and recently I found one more reason to love them.  After arriving in Alaska, my loaf pan broke.  This is the pan I bake all of my bread in.  The entire end broke off.  I was a little more than bummed.  Then, my sister (she’s in high school!) informed me that it has a 3 year warranty. What?!

Yes!  Your Pampered Chef stoneware has a 3 year warranty.  They will replace your stoneware if it breaks within 3 years.  This information made my day!

So how do you get a replacement if your stoneware breaks?

To get a replacement, all you need to do is find your sales receipt (if you still have it) and give The Pampered Chef a call.  I did not have my receipt, but they were able to help me look it up.

This part is important!  Next, you need to mail The Pampered Chef a chunk of your broken stoneware.  If you don’t mail it in, you will be patiently waiting for a package that will never arrive.  I may or may not know from experience. =)  The woman who took my replacement order forgot to tell me that I needed to mail a chunk in.

After The Pampered Chef receives your chunk (at least the size of your palm), they will ship you your replacement pan!  Here is my new pan (and my broken one)!

Get A Replacement Pampered Chef Pan

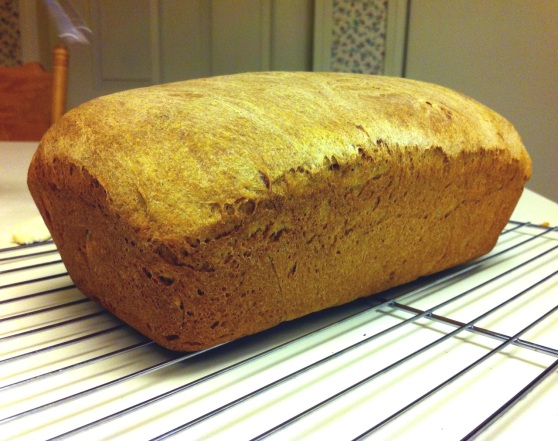
Oh, and I forgot to mention, these pans are made in the USA!  That’s just icing on the cake.  (hehe) So spoil yourself and spend the few extra dollars on the real thing.  You get what you pay for.  And you get delicious results like this!

Buttermilk Whole Wheat Bread

The Pampered Chef has not offered me any compensation for this post.  I am just a loyal customer.

Food Waste Friday: No Waste is Good Waste

FoodWasteFriday

After years of wasting hundreds, if not thousands of dollars of food, we are attempting to reduce our food waste. I will post a photo each week of our food waste and I will link up with Food Waste Friday over at The Frugal Girl.

I have absolutely no food waste to report this week.  I was really good about using up a half of a lemon to make a gallon of Tony’s favorite green tea.  I also used up a few small pieces of cheese in a very yummy grilled cheese sandwich.

Do you have any creative recipes to use up extra little bits of food?  How about any new ways to make over leftovers?

Incorporate “Preschool” Everyday

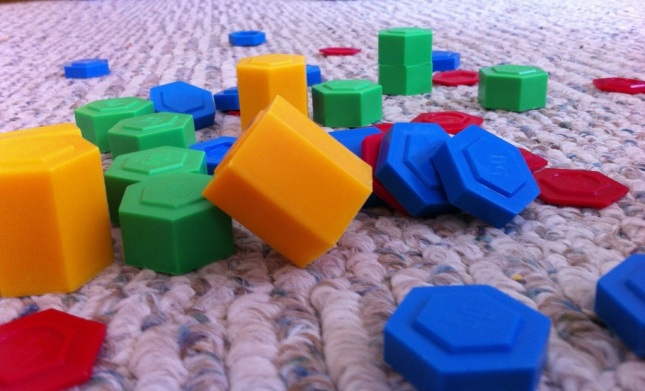
Colorful Blocks Homeschool Preschool

I was told by a former co-worker that her child was better off at preschool than at home because she could not do all of the activities that they do with him. (Insert my blank stare here.) The preschool employees are not doing anything that you cannot do yourself.  YOU are your child’s best teacher. Don’t doubt your own abilities.

Even though Ava is only 15 months old, preschool has already begun. We do not do any form or formal teaching. Preschool is just that, the learning your child does “pre school”. We actually practice more of a Montessori style of learning at our house.

Eventually I plan to set up a more formal Montessori playroom, but for now we just try to incorporate learning into our everyday routine. Our current living space is fairly limited.

So what do we do to encourage learning? Here are a few activities we regularly do.

  1. Allow your child to cook and clean with you. Ava loves to help cook. I let her get right in the action. (I want her to have a kitchen helper stool like this one. I will probably build her one this summer.) She helps stir and add ingredients. This is a great way to introduce your child to the kitchen. She knows that the stove is hot and that knives are sharp. I also allow her to feel the different textures of food as well as taste new things. As a result, she has a very broad palate. This girl loves everything! She also loves to “help” me do the dishes. These activities may result in a little extra clean up, but it’s so worth it.
  2. Use everyday objects in play. Ava has a whole collection of random containers, jugs, an old cell phone, and a wallet among other things. We don’t buy a lot of commercial toys, we just don’t need to. An old oatmeal container becomes a drum. A small shopping bag is perfect for sorting blocks.
  3. Play! Yes, play. You may think that your life is too busy or that free play is not important; make time for it. Free play encourages your child to use his or her imagination. Children who engage in more imaginative play have more self-control and a longer attention span when they get older.

See the blocks in the picture above? They are actually gram weights that I picked up for $.50 at The Salvation Army. Right now Ava loves to stack them and sort them by colors. She also loves to put them all in their bag and then dump them out. When she gets older, we can use them for counting, building patterns, and as actual weights. There are 1, 5, 10, and 20 gram weights. And if you were wondering, they hurt just as bad as legos when you step on them. =)

Do you “preschool” at home? Do you have any advice?

Maple Soy Salmon and Wild Rice

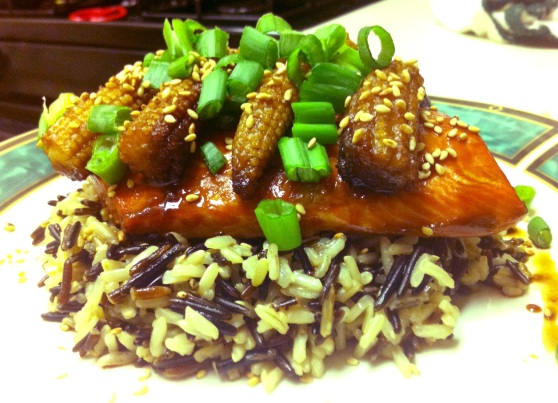
Maple Soy Salmon

I picked up some fresh wild Alaska salmon at the store tonight.  I wasn’t really sure what I was going to do with it, but salmon always turns out wonderful.  Wild rice is so much more hearty and flavorful than your basic white rice.  I whipped up this maple soy salmon with wild rice and baby corn in about 20 minutes.

Maple Soy Salmon with Wild Rice
Serves: 1 (easily doubled)

Ingredients:

  • Wild Alaska Salmon Filet
  • 1/8 Cup Maple Syrup (the real stuff!)
  • 1/8 Cup Soy Sauce
  • 1/4 Cup Wild Rice
  • 1/4 Cup Long Grain Brown Rice
  • Water
  • 1/2 TBSP Butter
  • Sesame Oil
  • Scallions
  • Sesame Seeds
  • Baby Corn or Other Veggie
  1. Boil both rices together in the appropriate amount of water (I used 1 1/2 cups for 1/2 cup of rice)
  2. Turn your oven to broil and set your oven rack to the middle or lower level.
  3. Place the salmon and your baby corn (or other veggie) in a pan or casserole dish.
  4. Mix the maple syrup and soy sauce and spoon about half of it on the salmon.
  5. Place the salmon under the broiler for approximately 10 minutes, or until done.  Spoon the remainder of the sauce over the salmon about a minute before removing the salmon.
  6. Once the rice is cooked, add the butter to the rice and stir.  Add a splash of sesame oil to the rice.  Pour rice on plate.
  7. Plate your salmon on the rice and place the baby corn on top of the salmon.
  8. Spoon the sauce from the bottom of the pan on the fish and baby corn.  Sprinkle with sesame seeds and chopped scallions.

Enjoy!