Homemade Graham Crackers…

… Also known as “The Most Delicious Snack Ever”.

Yesterday, Ava came to me asking for crackers.  We were fresh out.  Zero.  Zilch.  None.  Not even something I could pass off as a cracker.  I had zero interest in walking (or driving) to the grocery store, only to buy processed junk crackers.

Homemade crackers it is!

I remembered that I picked up a book at the library.  This was actually the second time I check this book out.  That rarely happens.  I actually love this book so much, I think I’m going to buy a copy.  I very rarely buy books because I’m such a fan of borrowing them from the library.  The book, The Homemade Pantry: 101 Foods You Can Stop Buying and Start Making, is  so overly useful.  I’m in love!

The Homemade Pantry

Anyway… so off we went, making homemade graham crackers.  I try to be very patient when cooking with Ava.  I let her scoop, pour, and stir.  She loves to help.  Even though it is completely unimportant at her age, we talk all about the measurements and each ingredient as we add them.  She touches the flour and smells the cinnamon.

Cooking with Toddlers

The dough for these crackers needs to rest in the refrigerator for at least 2 hours.  This perfectly fell during nap time.  When she woke up, I had just pulled the first batch of warm crackers from the oven.  She was beyond excited.  These little gems of cinnamon-sugar are too good not to share.  Next time (which will be soon), I think I will use some fun cookie cutters!

Homemade Graham Crackers copy

Whole Wheat Graham Crackers | Adapted from The Homemade Pantry

Makes 45-50 2×3 inch crackers

  • 1 Cup White Whole Wheat Flour
  • 3/4 Cup Whole Wheat Flour
  • 1/2 Cup Rye Flour, plus more for dusting
  • 1/2 TSP Salt
  • 1/4 TSP Baking Soda
  • 1/2 TSP Baking Powder
  • 1-1/2 TSP Ground Cinnamon
  • 1/4 Cup Packed Dark Brown Sugar (Make your own with raw sugar and molasses!)
  • 3 TBSP Cold Butter, cut into small cubes
  • 4 TBSP Coconut Butter
  • 4 TBSP Honey (Local, if you can find it!)
  • 2 TSP Vanilla Extract
  • 1 TSP Raw Sugar
  1. Combine the flours with the salt, baking soda, baking powder, 1 teaspoon of the cinnamon, and the brown sugar.  Mix well.  Add the butter and the shortening and mix until combined.
  2. In a separate bowl, combine the honey and vanilla with 1/4 cup of cold water.  Stir until the honey is dissolved.  Slowly add the honey mixture to the flour mixture.  Form the dough into a bowl and wrap in waxed paper and refrigerate for at least 2 hours, and up to 3 days.  (She says you can freeze it at this point.)
  3. Remove the dough from the refrigerator 20 minutes before baking.  Preheat the oven to 350°F.  Cut the dough in half and roll one half on a dusted surface (or between waxed paper).  Roll the dough as thin as possible, about 1/8 inch.  Cut your crackers into 2×3″ rectangles (or use cookie cutters!).  Place on a baking sheet using a spatula.  They won’t spread, so they can be very close.  Reroll the scraps and repeat until all of the dough is rolled.
  4. In a small bowl, combine the remaining 1/2 teaspoon cinnamon with the 1 teaspoon sugar.  Sprinkle the crackers with the cinnamon-sugar and prick the dough several times with a fork.  Bake for 15 minutes or until the edges are just starting to brown (about 12 minutes in my oven).  Remove from the oven and cool.

Graham Crackers From The Homemade Pantry

These crackers are incredible good.  Nothing beats homemade!  Enjoy!

SignatureIf you enjoyed this recipe, please share or Pin it!

This post contains affiliate links.  When you make a purchase, it helps support this blog and our family.  We thank you for your support.

Super Simple Veggie and Wild Rice Soup

All three of us are sick.  We’re not sure where it came from, or where it’s going, but it’s not fun.  Luckily, I think it’s just a bad cold.

One thing that always makes me feel better is a good bowl of soup.  I love this soup and any variation of it for its simplicity and deliciousness.  It’s so simple that it really doesn’t require a recipe.  It’s also great for using up all those extra veggies you have in the fridge.  That being said, this is more of a “flavor guide” than a recipe.  You can make as much or little as you want.  I made just enough for Ava and myself because Tony was suffering at work.  I told him to go pick up some Pho as a consolation prize.

The Scacchi House: Veggie and Wild Rice Soup

So what’s in the soup?

  • Wild Rice
  • Potato
  • Carrot
  • Kale
  • Fresh Ginger
  • Veggie Broth
  • Water
  • Salt & Pepper
  • Half & Half (optional)

That’s it, really!

I had about 3/4 cup of left over veggie stock.  I added it to the pot along with a jar lid full (I told you, this is not an exact science, but it was about 1/3 cup) of wild rice.  I diced a carrot and a small potato; into the pot they went.  I added some water to cover everything.  You could use all stock, but I just used what I had.

Bring it all to a boil.  While its boiling, mince up a nice size chunk of fresh ginger and add it to the soup.  If it looks like your soups getting dry, just add more water.  No stress.

When the rice is about half-way done, finely chop your kale (rib removed) and add it to the soup.  Simmer the soup until your rice is cooked, about 30 minutes total, adding more water if needed.

Once your rice is tender, season with salt and pepper.  I also added a splash of organic half & half to make it creamy.

The Scacchi House: Veggie & Wild Rice Soup

This really is a perfect bowl of soup when you’re sick.  Pair it with a mug of green tea and honey and you’ll be on the road to recovery.  Oh, and it’s toddler approved!

Do you have a favorite go-to soup recipe?

nopin

The Feeling of Health: Part 2

The Scacchi House: The Feeling of Health - How to Eat Clean

Last week in Part 1 I outlined how I got to this point. Oh the many years of believing spray butter was healthy. I was so wrong.

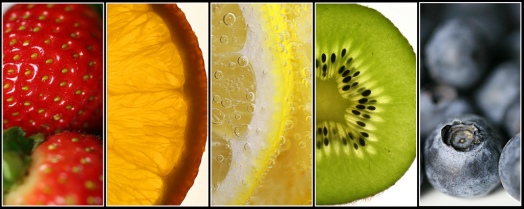
I firmly believe that food is 80% of the battle.  You can exercise all you want, but if you eat garbage, that’s all your body will ever be. You are what you eat, right. If so, I wanted to be bright, colorful, and healthy, not fake and carcinogenic.

The Scacchi House: Intro to Clean Eating

Photo Credit

So what exactly is eating clean? I guess it could mean slightly different things to different people. To me, eating clean is basically eating real, whole, and natural foods. Your food shouldn’t come from a package or have ingredients that you can’t pronounce. That mean no more Oreos. Don’t freak out.

When I began this journey I simply stopped buying crap. I let Tony finish up the few “bad” things left in the house and began from scratch. I stopped shopping in the center aisles at the grocery store (with a few exceptions). I began viewing processed food as poison, because that’s what it is.

The Scacchi House: How to Eat Clean

So what do I buy? What do I eat? It’s very simple. So lets say your typical dinner plate consists of 50% meat, 30% carbohydrate, and 20% vegetables, my dinner plate looks drastically different. My plate typically consists of 70% vegetables and 30% carbohydrates. Remember, I don’t eat meat, only on a rare occasion. If you don’t think you can completely cut meat, change your ratios around. Vegetables should make up at least 50% of your meal. Your carb should be a whole grain. Try recipes that use meat more as a side dish or as a flavor enhancer. A lot of Asian and southwest dishes come to mind.

Take a look in your pantry. Make a list if your favorite things (or everything for that matter). You need to find replacements for them all or eliminate them from your diet. Read the back of every label. I guarantee that only a few things are worth eating.

The Scacchi House: Clean Eating Food Swaps

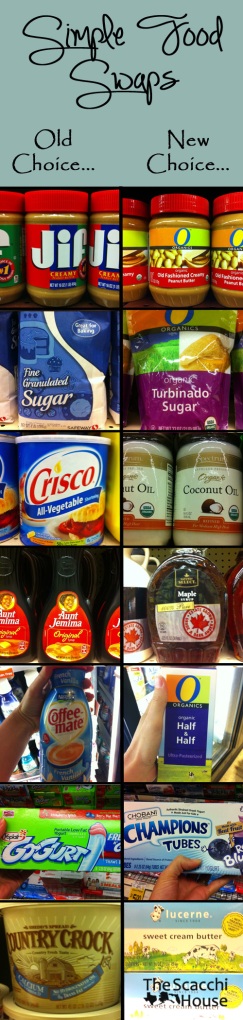
Swapping your food won’t be as difficult as you think.  Your peanut butter should be just that, peanuts (and maybe a little salt).  Take a look at your favorite coffee creamer.  I bet you will be shocked that it’s not cream at all.  Most likely, the first three ingredients are water, sugar, and partially hydrogenated oil.  I don’t know about you, but I don’t want to “cream” my coffee with oil.  Swap it for some half and half.  Watch the non-organic kind though, sometimes they have emulsifiers and preservatives, both of which are a chemical-slurry-no-no.  As for butter, real is always better.  Margarine has absolutely no nutritional value, bugs won’t even eat it.  Stay away from the fake stuff (any butter replacement) and enjoy some butter.

Look to your veggies for inspiration. For the first few weeks, look for vegetarian recipes online. Try new things. If you don’t know where to start, check out my Pinterest food boards.  Get creative!  I can’t even begin to tell you how many fruits and veggies I had only had frozen from a can. Don’t be afraid.  Try to buy as much fresh fruits and veggies as possible.  I do not buy anything canned, with the exception of these two bad boys.

Canned Goods

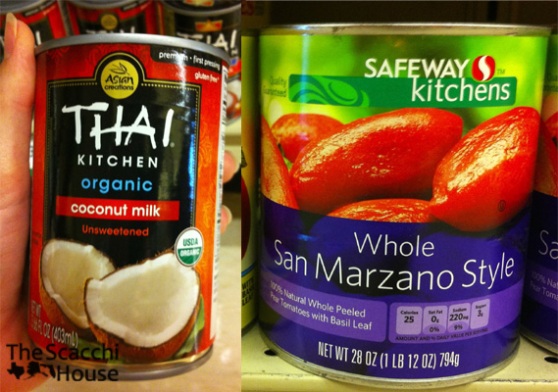
I love cooking with coconut milk.  I made a vegetarian curry just last night.  I tried it with bulgur instead of rice… AMAZING!  I use San Marzano tomatoes to make pasta and pizza sauce.  I just add a few herbs and spices, drop it in the blender and it’s ready to go.  Canned veggies are better than none, but avoid them if you can.  The cans are lined with BPA, which is no bueno (and another post all together).

As for frozen, I like to have corn, peas, and maybe pearl onions on hand for soups.  That being said, I ONLY buy organic frozen veggies.  TWICE I have found metal shards in conventional frozen corn, but never in organic.  I’m not taking a chance with my family.  Fresh fruits and veggies are not that expensive. Try everything, you will be pleasantly surprised when you find new favorites. In the first few weeks of eating clean, cooking and eating became an adventure. I was experiencing flavors and combinations I had never had before.

So you want specifics? This post could go on forever.  I’ll give you a few examples.

At breakfast you eat a bowl of fruity pebbles (or insert any other commercial cereal here). Put them down. You are killing yourself with overly processed grains, sugar, and artificial colors and flavors. Instead, make a bowl of 6-grain oatmeal. Yes, the kind you actually have to cook. Food should never be fast or cheap, that’s my motto. Top it with fresh fruit and maybe even some chia seeds. If you are missing the sweetness, drizzle a small bit of raw, unfiltered local honey or REAL maple syrup in top. A little goes a long way.

Swap everything for the REAL version. Yep, I’ve lost 20 pounds eating butter, no joke. I’m giving you permission. If it’s not real, it has no business being in your kitchen. If it says low-fat or fat-free, it doesn’t belong (with a few exceptions). I buy full fat dairy. Cheese, cream cheese, sour cream, etc. I do buy 2% organic milk and my yogurt and cottage cheese are reduced-fat/fat-free of some sort, but that’s just how they come. Fat free translates to “full of sugar.” We don’t want any of that.

The Scacchi House: How to Eat Clean

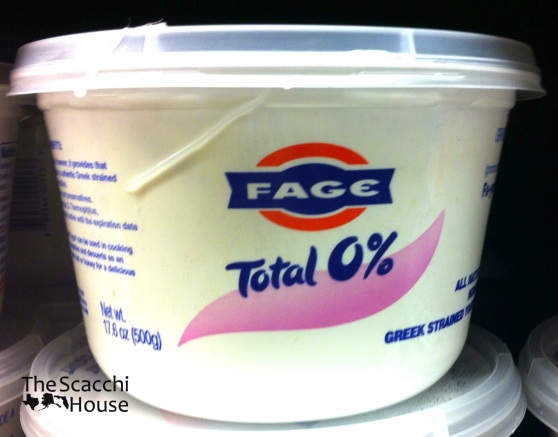
I love love love plain Greek yogurt.  I put it on everything.  I use it like sour cream.  You can make it sweet (with fruit and honey) or savory (add fresh herbs and spices).  Get creative!

Stay away from sugar-free, no sugar added, and artificial sweeteners. Artificial sweeteners are fake and don’t belong in your body. If you need sugar for something, use organic raw cane sugar. I use hardly any sugar anymore. In fact, I only buy it by the half-pint (Our local bulk store lets me bring my own jar!).  Once you wean your body off of it (in about 2 weeks), you will no longer crave it.  Seriously!

The Scacchi House: Eating Clean

If you are going to eat meat, try to find 100% grass-fed and organic if possible. Your body can’t handle all those hormones and antibiotics (this is why 9-year-old girls have boobs).  All seafood should be wild caught, never farmed and definitely not from China.

So what are some of my new favorite foods?

  • Avocado – Full of healthy fats, this fruit goes with everything. If you’re not sure about it, try it several ways.  I use it in salads, wraps, pasta and rice dishes, pretty much everywhere.  It’s Ava’s favorite food. She eats it straight from the skin.
  • Quinoa – This is sort of new on the scene. It’s actually a seed, not a grain. It cooks up just like rice. It is a complete protein, which is great for vegetarians. It has a slightly nutty flavor.
  • Chia seeds – These are the same seeds from everyone’s favorite chia pet. They don’t taste like anything, so they are a great addition to just about anything.  They are high in omega-3 and fiber.
  • Beets – Really!  I use them in tacos or slice them up and grill them for a beet slider.  Top them with some homemade green goddess and you’re ready to go.
  • Sprouts – I never liked sprouts because I thought they were all from mung beans.  You can sprout just about anything.  I love broccoli sprouts and I have some quinoa sprouts growing.  They are great to top salads, sandwiches, or soups.

Eating clean isn’t difficult.  Once you get through the initial week or two and you’re no longer addicted to sugar, you will look at cakes, donuts, and candy as toxic waste.  I’m not going to lie and tell you I’m perfect.  I did have ice cream last night and I occasionally indulge in an 85% dark chocolate bar (eaten over a few nights).  You will not get it right 100% of the time, but you can try your best.  Eat fresh, real foods and cook from scratch, that’s my best advice.

If you have any specific questions about eating clean or any recipes, leave me a comment or email me at scacchihouse@yahoo.com.

Here’s Part 1 if you missed it.  Stick around for Part 3: Beating the Sugar Addiction.

nopin

Build Those Pineapple Palm Trees

I’m sorry if you are seeing this twice this morning.  We are having some technical issues with our photos.  Hopefully they are resolved now.

Are you curious how I made the pineapple palm trees I talked about here?  Although they were a bit challenging at first, they were fun and exciting to build.  Here’s another look.

Wedding Pineapple Palm Trees

Here’s what you need to build the palm trees:

  •   8 Pineapples (4 for each tree)
  • 5 feet of 3 1/2 inch PVC pipe
  • 2 PVC caps
  • Fresh palm fronds
  • 1 bunch of Kale
  • 2 Floral Foam Disks
  • Burlap
  • Toothpicks
  • Rocks or Water Softener Salt

Let’s begin!

Do yourself a favor and pick the right pineapples.  Your pineapples should not be green when you cut them.  The best way to pick a pineapple is to smell it.  It should smell sweet and delicious.  If your store only has green pineapples, buy them a few days before you want to cut them.  They will most likely be perfectly ripe by the time you are ready to cut them.

Cutting a Pineapple

To get the pineapples to slide over your PVC pipe, you need to hollow them out.  On a cutting board (preferably one that will catch the extra juice), slide a very long sharp knife down along the skin of the pineapple.  It should glide very easily along the skin.  You only want to cut about half way down.  Take your time.

Remove Pineapple Skin

After you have made it all the way around, turn the pineapple upside down and cut along the skin once again.  Once you have made it all the way around you may need to gently slide your knife along your cut to loosen up any flesh that’s still attached in the middle.

Removing Skin from Pineapple

The solid chunk of flesh should slide right out of the pineapple skin.  You will be left with two pieces: The solid skin ring and the chunk of juicy delicious flesh.

If you are not building your palm trees the same day, you will need to store your pineapple skins.

Pineapple Palm Tree

I simply wrapped mine in a plastic grocery bag and tucked the excess bag in the top of the pineapple skin.  I then stashed them in the refrigerator.  I cut mine two days in advance.  I don’t recommend cutting them any earlier than that.

Cutting Pineapple

You will then want to cut up the pineapple flesh.  I cut mine into equal quarters.  To remove the core, run your knife down the inside corner of each quarter.  This will give you little wedges with the tips cut off.  You can then slice the quarters into wedges or chunks.  Store your cut up pineapple in airtight containers or bags until you are ready to serve.

Pineapples

My little helper woke up from her nap half way through.   Gotta love the hair!

Pineapple Palm Tree Stand

You will need to build a PVC stand for your trees.  We bought a 10 foot length of 3 1/2 inch PVC pipe.  We really only needed 5 feet of pipe but the 10 foot pipe was almost $1.00 less, go figure.  We were able to easily cut the PVC down to size with a simple hack saw.  You can see at the bottom that we purchased an adapter piece that sizes it up.  This allowed us to use the cap that Lowe’s had available.  The adapter also created a nice little base for the trees.  My mom and I both agreed that if we used them again, we would definitely paint them brown.  The white becomes troublesome to hide.  More on that in a bit.

Build a Pineapple Palm Tree

To assemble the trees, simply slide the pineapple skins down over the pipe.  The bottom pineapple should sit right on top of the adapter piece.

I’m going to apologize for the lack of assembly photos from this point.  We were kind of in a hurry for a wedding. =)

Wedding Pineapple Palm Trees

To cover the white PVC bases of your trees, creatively wrap kale around the base.  We also got creative and added some flowers to the mix.  We also used collard greens as a base for our fruit display.

Once you thread on all of your pineapples you may or may not have some PVC pipe left exposed.  If you have your hack saw handy, feel free to shorten it up.  We were fresh out of hack saws at the wedding location.  We improvised by wrapping the remaining pipe with burlap, which worked really well.

Pineapple Palm Tree Top

Fill your PVC pipe with your heavy material.  We used solar salt (evaporated sea water) that is normally used in a water softener.  We wanted to use something safe around the food.  After the wedding, we used the salt for a sensory bin for Ava.  Double win!

Cap your pipe off with the floral foam rounds.  We found these at the Dollar Store.  We held up the burlap with a few toothpicks in the foam.  Top of your tree with lots of fresh palm fronds.  My Uncle Cris graciously picked these for us from his yard in the dark.  Thanks Uncle Cris!

You’re finished!  Your trees are done and you can finish decorating the rest of your table scape.

Do you have any pineapple tree plans?

(Psst… Don’t you just love our new watermark?)

Pineapple Palm Trees and All That Jazz

My aunt’s niece (on her husband’s side) got married recently while I was on vacation in Florida and my Aunt Sue asked my mom and me if we could help out with a few things.  And we did!  She enlisted us to make the cupcakes (and display them) and do some sort of fruit table.  She sent me a few ideas , but for the most part, all of the details were up to us.

The wedding was in Titusville, Florida at the home of the bride’s friend.  The house was a charming old bungalow right on the river.  I was in love… with the house.  I’m kicking myself now for not taking a photo tour; we were just entirely too busy.

I’ll just cut to the chase and show you what we did.  Everything turned out fabulous, if I must say so myself!

Pineapple Palm Trees Fruit Table

 We pulled together this bounty of fruit.  Every tropical fruit table needs a palm tree or two.  You want to know how to make them?  Check out my tutorial here.  You can see some of the awesomeness that is the vintage kitchen behind the table.

Fruit Table

Along with the pineapple we served strawberries, watermelon, cantaloupe, grapes, blueberries, raspberries, and blackberries.

Tropical Wedding Table

Their theme was an eclectic mix of tropical rustic.  If you were to cross a Hawaiian luau with a backyard picnic, there you have it.  I will have to say that it was a very lovely, relaxing, and enjoyable reception.  No fuss and everyone had a great time.  That leafy green stuff is kale if you were wondering.  And yes, I did take it home after the wedding.  It was delicious in some fettuccine alfredo and it made me happy that it didn’t get thrown away (unlike the collard greens).

Hawaiian cupcakes

We made simple cupcakes; chocolate, vanilla, and carrot cake.  All three flavors were topped with my mom’s homemade buttercream icing. Yummy!  If you are wondering about the flower toppers, they are actually little plastic rings.  They were a hit with the kids.  Ava’s Elmo and Big Bird even came home with one as a bracelet.

DIY Cupcake Stand

We made roughly 80 cupcakes.  We made the cupcake stand with some hints from Annie’s Eats.  Ours is larger than hers, but the idea is the same.  We used the cardboard cake rounds that you can buy at any party store and quite a few cans of soup  (16 to be exact).  We wrapped the cans in white wrapping paper and added a burlap detail to match the burlap table runner the bride picked out.  It worked perfectly.

Toddler trying to get cupcake

I even caught my little helper trying to help herself to a cupcake.  Don’t worry, she wore a dress to the reception.  This was while we were setting up and she was having a few strawberries.  You have to keep the dress clean somehow.  It didn’t stop her.  By the end of the night her dress was covered in fruit.  Thank goodness Gymboree’s fabrics hold up to heavy-duty scrubbing!

Tropical Wedding Cake

The cake toppers are actually salt and pepper shakers.  Their lips are magnetic.  How fun is that?  Oh and if you were confused, there was a mirror behind the cake stand.

Ava Scacchi

We all had a blast!  I’m so glad we got the opportunity to help out.  I’ve got some mad pineapple cutting skills now.

Baked Maple Pears

I’m still posting from my phone, which I absolutely hate. Although, I am thankful that I have the ability to post from my phone. Here’s an interesting fact: If you purchased your computer after 2008 (which I’m sure you did), it did not come with that handy little factory reset disk. You now have to call the manufacturer (Dell in our case) and PAY for it. Anyway…

We are trying to eat up all of our food before we fly out next week. Last week I bought my usual 4 pears that I buy every week. They are normally soft, juicy, and oh so sweet. Not so much for these 4. They are too firm and not very sweet. Not my idea of our usual afternoon snack.

So for breakfast, I thought I would bake one of my pears in some maple syrup. OH. MY. GOODNESS. So sweet and creamy. I can’t even begin to explain how good they were. And! They are super easy to make.

20130409-104456.jpg
Baked Maple Pears

Ingredients:

    1 or 2 Pears, quartered and the core removed.

    1/4 Teaspoon Vanilla

    1 Tablespoon Butter (don’t even think about using margarine)

    1/4 Cup Maple Syrup (the real stuff, it should only have one ingredient)

20130409-104618.jpg
Preheat your oven to 400 degrees (F).
In a baking dish, pour the vanilla and coat the pear quarters.
Pour the maple syrup over the pears and top each quarter with a small piece of butter.
Cover with foil and bake for 30 minutes.
15 minutes into the cooking time, baste the pears with the maple syrup and return to the oven.
After the 30 minutes, remove the foil and baste again. Return the pears to the oven uncovered for an additional 15 minutes.
The sauce will thicken. Remove from the oven and serve.

These pears are great on their own but would be amazing with some vanilla ice cream.

If Ava doesn’t wake up soon, I’m going to eat her piece. =)

Banana Bread: Nana’s Recipe Makeover

Banana Bread

One thing we always had regularly at our house growing up was banana bread.  My Mom used the same recipe that my Grandma (Nana) always used.  One day I was longing for a taste of home.  I wanted to bake some of that wonderful banana bread that my Mom always made.  I called Mom and had her email me the recipe.  Since we are trying to eat as clean as possible, I made a few adjustments to the recipe.  It tastes EXACTLY the same!  I was so happy.

I put the recipe on one of my new chevron recipe cards for you to enjoy.  If you like the recipe card, it is available as a Word template in my Etsy shop in a few different colors.  This recipe is available here as a PDF download.

Banana Bread Recipe Card

This recipe is so easy.  You now have no excuse to use a boxed mix!  To make this recipe a bit more “clean,” I substituted coconut oil for the shortening and whole wheat flour for the all-purpose flour.  I also use organic evaporated cane sugar instead of white sugar.  It does not change the taste or texture at all.  Tony had no idea it was made with whole wheat flour.  You can also add walnuts (or any other nut) to the bread, but I personally feel that nuts in baked goods are an abomination. =) Tony feels differently.

To download the recipe card, click here.  Enjoy!

Are there any foods that remind you of home?  Let me know how you like this banana bread recipe!

Maple Soy Salmon and Wild Rice

Maple Soy Salmon

I picked up some fresh wild Alaska salmon at the store tonight.  I wasn’t really sure what I was going to do with it, but salmon always turns out wonderful.  Wild rice is so much more hearty and flavorful than your basic white rice.  I whipped up this maple soy salmon with wild rice and baby corn in about 20 minutes.

Maple Soy Salmon with Wild Rice
Serves: 1 (easily doubled)

Ingredients:

  • Wild Alaska Salmon Filet
  • 1/8 Cup Maple Syrup (the real stuff!)
  • 1/8 Cup Soy Sauce
  • 1/4 Cup Wild Rice
  • 1/4 Cup Long Grain Brown Rice
  • Water
  • 1/2 TBSP Butter
  • Sesame Oil
  • Scallions
  • Sesame Seeds
  • Baby Corn or Other Veggie
  1. Boil both rices together in the appropriate amount of water (I used 1 1/2 cups for 1/2 cup of rice)
  2. Turn your oven to broil and set your oven rack to the middle or lower level.
  3. Place the salmon and your baby corn (or other veggie) in a pan or casserole dish.
  4. Mix the maple syrup and soy sauce and spoon about half of it on the salmon.
  5. Place the salmon under the broiler for approximately 10 minutes, or until done.  Spoon the remainder of the sauce over the salmon about a minute before removing the salmon.
  6. Once the rice is cooked, add the butter to the rice and stir.  Add a splash of sesame oil to the rice.  Pour rice on plate.
  7. Plate your salmon on the rice and place the baby corn on top of the salmon.
  8. Spoon the sauce from the bottom of the pan on the fish and baby corn.  Sprinkle with sesame seeds and chopped scallions.

Enjoy!

Give It a Try!

Photo by Comprock

Photo by Comprock

Changing my eating habits has been positive for me in more than one way. Not only have I dropped two pant sizes without trying, but I have tried so many new foods that I’m finding to be amazing!

Growing up, my mom fed me fruits and vegetables.  Our veggies usually consisted of canned corn, canned green beans, canned carrots, and potatoes.  We did eat more fresh fruit, typically apples, bananas, and sometimes peaches.  We didn’t eat much variety, and what we did eat, usually came from a can.

In just the past two months, I have eaten more fruits and vegetables than I have eaten in probably the past 10 years.  I have also tried so many new things, or foods that I had never had fresh.  This is my list of things you should try if you have never had them or just try to eat more of!

  1. Beets – I did eat beets as a child.  My mother took us to Morrison’s (now Piccadilly) on a weekly basis after swimming lessons as a child.  The man there said I was the only child that ever asked for beets.  This was my only experience with beets… out of a can.  We recently had lunch from one of the food trucks here in Anchorage.  Their only vegetarian option was beet sliders.  I knew I liked beets as a child, but it had been so long.  I gave them a shot.  Fresh beets are So. Much. Better!  Since trying the sliders, I have made roasted beet tacos and roasted beets with quinoa.  Give beets a shot!
  2. Butternut Squash – I had never had butternut squash until about a month ago.  We were at Alaska Bagel and they had butternut squash soup.  I had a taste of Tony’s and it was delicious.  Since then I have been in love with butternut squash.  I made soup, which was good, then I used the leftover soup to make butternut squash mac n’ cheese.  Be creative! (I also tried spaghetti squash the other night at a restaurant.  Give that a try too!)
  3. Pears – The only pears I had ever eaten as a child were the canned pears they served in the cafeteria at lunch.  I had no concept of what a fresh pear would taste like.  I am in love with fresh organic pears.  They are now a regular on my grocery list.  They are the perfect snack.
  4. Quinoa – I had never even heard of quinoa until my cousin Ellen came back from wilderness camp.  It was one of the few things they ate and she said she would never eat it again.  Since then, I have gathered a ton of recipes for quinoa.  It is so good for you and is a great substitute for rice.  Give it a try if you haven’t already.
  5. Lentils – Lentils are completely new to me.  They are a legumes and they are super tasty.  I made lentil soup for dinner last night.  Ava likes to eat them raw, only soaked (I tried one like this, it is gross).  They have a slightly peppery flavor.  Yummy!

I am still learning on this new food adventure.  I am trying new things every day.  What are some new foods you have tried recently?

Ultimate Whole Wheat Tortillas

I have been on a mission to master my whole wheat tortilla recipe. I love tortillas because of their diversity. They can be wraps, tacos, quesadillas, tostadas, flat breads, chips, you name it! We are trying to eat very little processed food and store-bought tortillas are definitely processed, not to mention filled with preservatives. Plus they cost almost $4.00 for 10! I knew I could do better.

I’ve spent the last month playing with my recipe. I have tried a few different combinations of flours and oils.  I am happy to announce that I have officially perfected it! These tortillas are whole wheat and still very pliable, not to mention delicious! All of the whole wheat tortillas I have bought at the grocery store crumble when you try to fold them, even if you warm them up. That doesn’t make a very good taco. This recipe fixes that problem. The best part is that I can whip up a batch of these in about 30 minutes (maybe 45 until you get a system down). So here it is!

Amanda’s Ultimate Whole Wheat Tortillas20130129-180629.jpg

Servings: 14 Soft Tortillas
Time: 30 minutes

2 cups whole wheat flour
1 cup unbleached all-purpose flour
1 tsp salt
4 tbsp coconut oil (room temperature)
1 cup warm water

  1. Combine the both flours and salt in a mixing bowl.
  2. Add the coconut oil to the flour mixture. The coconut oil should be room temperature and be the consistency of shortening. Combine the flour mixture and the coconut oil with a fork or pastry blender. You want to fully incorporate the oil into the flour until it is about pea size or smaller.
  3. Stir in the water until the dough forms. You may want to use your hands at this point. If your dough seems too dry, add a little more water, about 1 tbsp at a time until it comes together. If the dough is too wet, you can add a bit more flour.
  4. Form balls of dough about the size of a golf ball. Set aside.
  5. Warm a frying pan or griddle to medium low heat (about a 3-4 on my stove). DO NOT add any oil to the pan. Your tortilla dough has plenty of oil.
  6. To roll out the tortilla balls between two pieces of aluminum foil. If your dough is sticking, slightly flour. I use a rolling pin to roll them out, slightly rotating between each pass. Roll them as thin as you can. If you don’t have a rolling pin, a wine bottle will work.
  7. Remove the top piece of foil. You can either make rustic tortillas (odd-shaped) or make round tortillas like I did. I used a salad plate to cut mine. Place the salad plate upside down on your rolled out dough and use a knife to cut around. Remove the excess and set aside.
  8. Peel the dough off the foil. I do this by placing the dough in my hand and peeling off the foil. It should come off fairly easy.
  9. Lay the dough flat in the warmed pan. Cook on each side for 30 seconds. It doesn’t take long. Once you get a system down, you will be able to roll your next tortilla between flips.
  10. Remove your tortilla and set on a cookie sheet or cooling rack. Repeat until all of the dough is used up! I used my scrap dough to make mini tortilla for Ava.

After my tortillas cool, I stack them and store them in a Ziploc bag in the refrigerator. One batch lasts us about a week.

Have you ever made homemade tortillas?